

When I was about 10, my parents bought me an yellow dress for my birthday. It was a knee length yellow and white striped thing, with puff sleeves, and, plain yellow bib like flap on top and skirting at the bottom. The bib and skirting were embroidered - "Sweety" and "But Naughty", in sprawling cursive letters. It was my favorite dress for many years; even when it faded and frayed, and, I outgrew it in height. I loved the color, such a happy tone but more than that, at that time still an introvert, I thought the writing was terribly clever.
Read Morecitrus

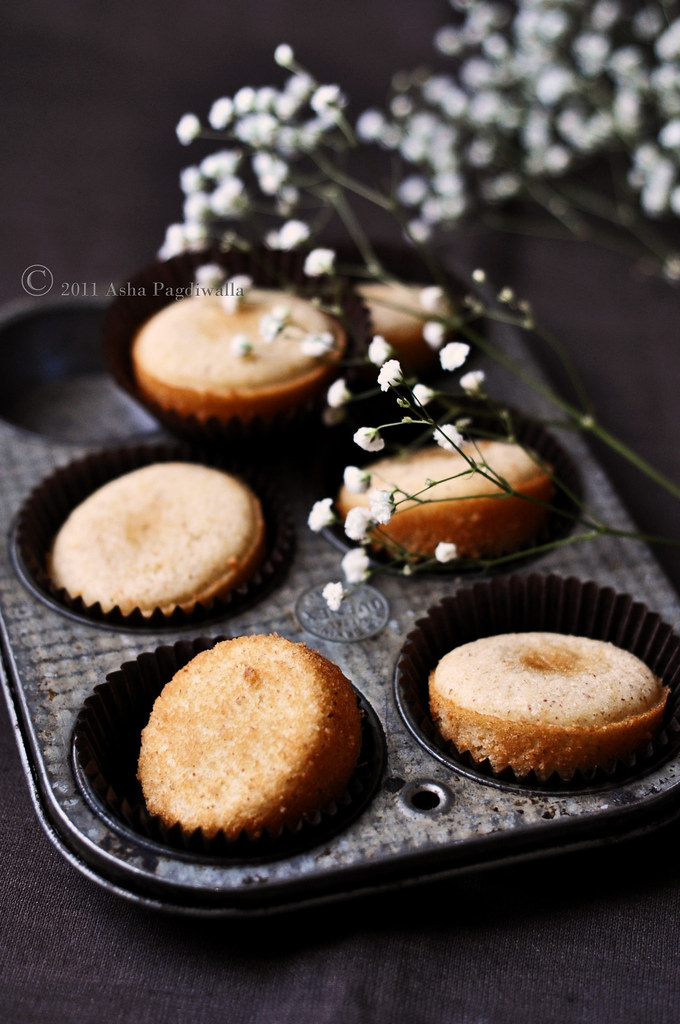
Gluten free carrot-cake inspired doughnuts with a blood orange cream cheese frosting are lovely served with tea or coffee. Your choice! :)
Gluten Free Carrot Cake-Do(ugh)-Nuts + Blood Orange Cream Frosting
in Dessert, brunch, Food & Drink
Carrot cake is quite popular in my house. Consequently, several variations of it feature on this blog as well like frosted layered cakes to mini cakes to cup cakes and more. But, none of them have been gluten free, well, because I did not need to. I need to now.
So, recently, when the desire to have carrot cake set in again, it was the perfect opportunity to test how the recipe work when the chemistry of flour ingredients are changed on their head. Fortunately, I struck gold with the first recipe I tried and it was also the one that had worked best for regular flour and has been particularly popular with readers.
In this post, I catalog some of the factors that I work with when transforming recipes with regular flour to gluten free creations in my kitchen. In this recipe, I used a blend of oat and almond flours, which, I think works wonders for sweet stuff.
Continue reading to find out why and get the recipe for these adorable cake-do-nuts!
Read MoreCitrus Frivolous: Orange Pannacotta, Lemon and Poppyseed Semolina Cake and Citrus Sauce - Daring Bakers
I almost did not make this DB challenge. As usual, I pushed it to the eleventh hour, which, normally is manageable. But, this time, the elements were not working with me. The sudden and drastic turn in the weather, last week, left me holding my head in my hands, willing the shooting pain to go muss someone else's life.
Sigh.. yes, Sinus trouble. After 28 years of free breathing and cooperative nasal passages, I seem to be caught in the throes of a mutiny! I am caught powerless and unable to stem the seige. What is worse, it has the most inconvenient timing! All of last week was a wash out of throbbing temples and ineffective medication :(.
Sigh.. yes, Sinus trouble. After 28 years of free breathing and cooperative nasal passages, I seem to be caught in the throes of a mutiny! I am caught powerless and unable to stem the seige. What is worse, it has the most inconvenient timing! All of last week was a wash out of throbbing temples and ineffective medication :(.
So, come Saturday, the 26th, I was still unsure of what the day would bring. To make matters worse, my downstairs neighbor, far too young, was hitting the highs on his stereo and alcohol. At 4 am, I was woken up by my heart thumping irresistibly to the beats of the music reverberating from beneath.
After a frustrating half hour of trying to turn a deaf ear, I woke the poor hub to go do the manly thing and get the guy to see sense. Well.. it's hard to drive sense into a stoned out mind!:-O We spent a good amount of time buzzing the guy's door to no response. We guessed he had passed out and had to go back and make the best of it. So the music went on, and eventually, my poor tired body won over my heart's light footed-ness.
Nevertheless, when I woke up, my sinus was still an issue. Mr. FSK showed me a grandma's technique for nasal wash and it was somewhat effective, atleast for a while. I decided to make the most of my, what was likely to be a, fleeting luxury of painless lucidity. Searching for inspiration, I reached out to my short stack of cookbooks and came across a recipe by Chef Richard Leach that had me captivated.
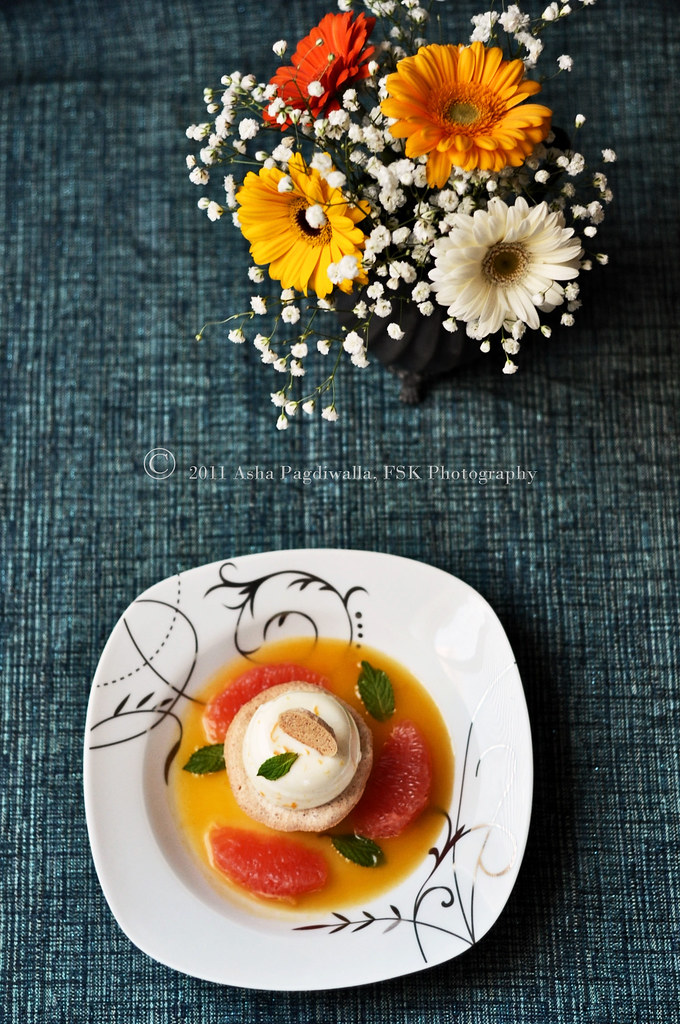
It helped that it was a pannacotta dish, just perfect for this challenge. But, what made it interesting was that it was a beautiful and well thought out plated dessert.. one with multiple components like those whipped out by the best pastry chefs. So, I decided to tweak and adapt it, to make it more approachable.
My mind set to the task, I decided to ignore the pangs up North and plowed through it. OK! it was not so bad. The recipe does have multiple components but they are not so time consuming to put together. It does need a bit of planning but is quite worth it.
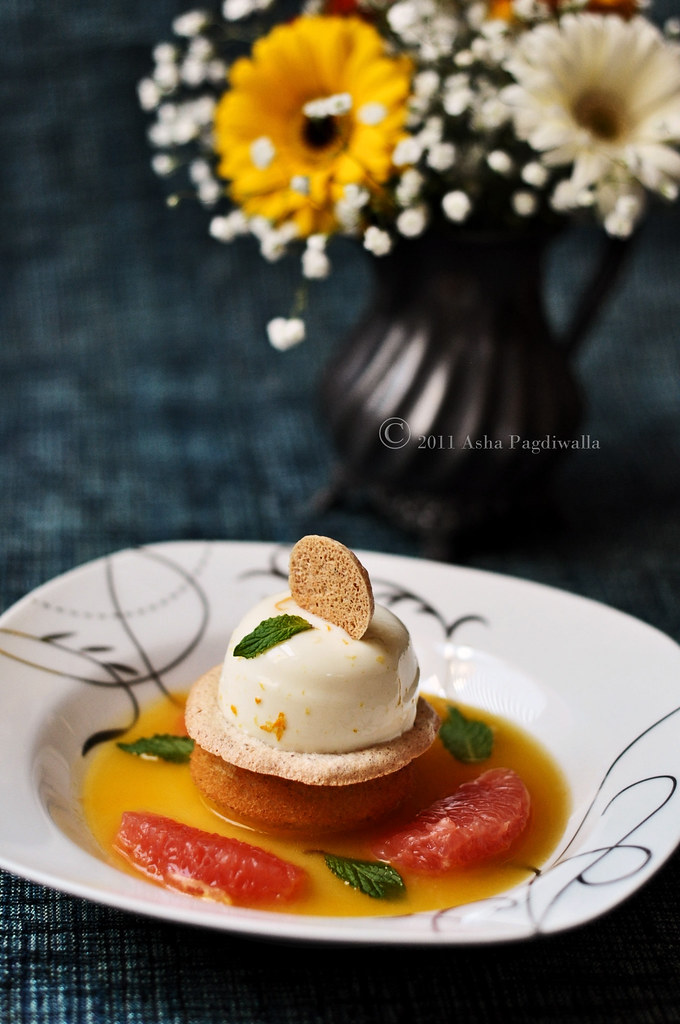
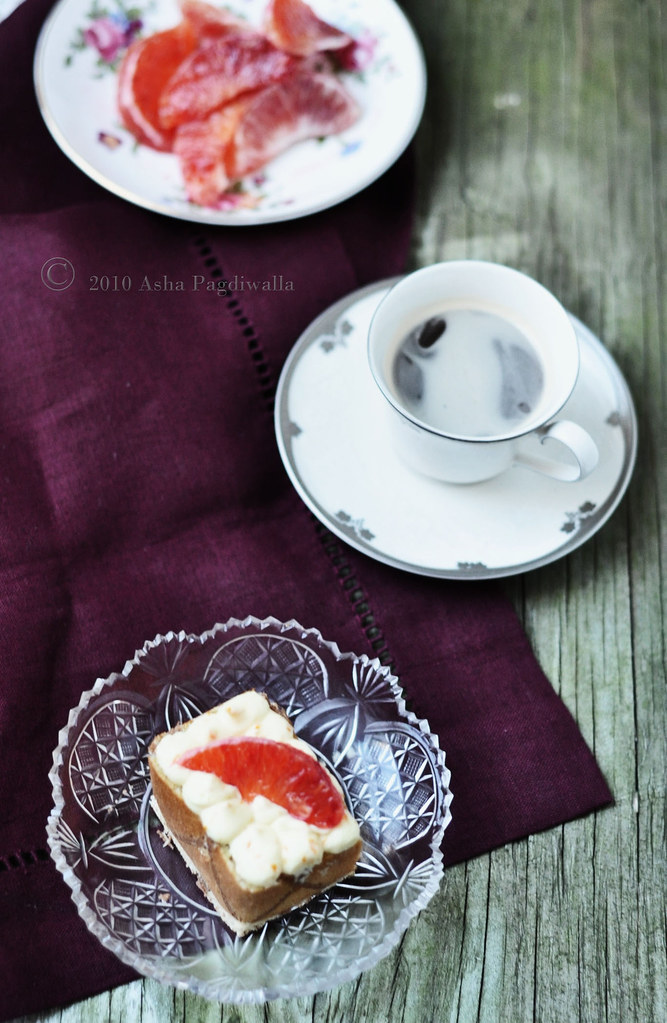
The warm sponge like cake soaking in the hot citrus syrup forms the perfect counterpoint to the crispy meringue and cold pannacotta. Chef Leach had accompanied a similar dessert with a fruit sorbet and I do think it would have made a great addition to the dessert, making the hot and cold play even more compelling.
My mind set to the task, I decided to ignore the pangs up North and plowed through it. OK! it was not so bad. The recipe does have multiple components but they are not so time consuming to put together. It does need a bit of planning but is quite worth it.
The warm sponge like cake soaking in the hot citrus syrup forms the perfect counterpoint to the crispy meringue and cold pannacotta. Chef Leach had accompanied a similar dessert with a fruit sorbet and I do think it would have made a great addition to the dessert, making the hot and cold play even more compelling.
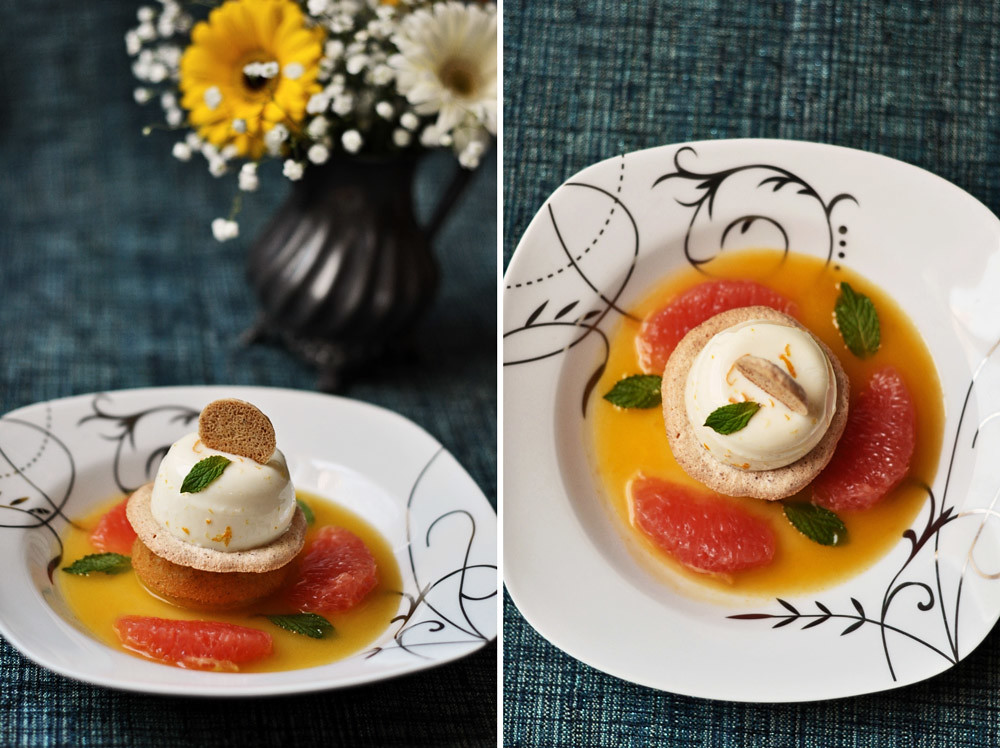
So, let me present my Citrus Frivolous: Orange Pannacotta, Lemon and Poppyseed Semolina Cake and Citrus Sauce.
The February 2011 Daring Bakers’ challenge was hosted by Mallory from A Sofa in the Kitchen. She chose to challenge everyone to make Panna Cotta from a Giada De Laurentiis recipe and Nestle Florentine Cookies.
The February 2011 Daring Bakers’ challenge was hosted by Mallory from A Sofa in the Kitchen. She chose to challenge everyone to make Panna Cotta from a Giada De Laurentiis recipe and Nestle Florentine Cookies.
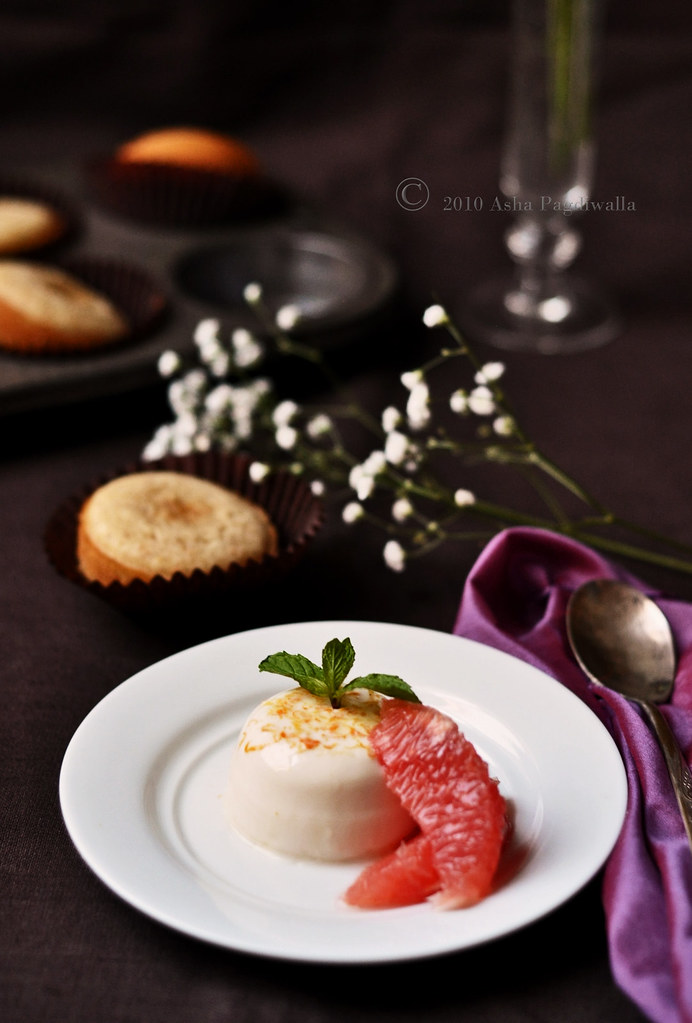
Citrus Pannacotta
2 cups half and half
2 tsp powdered gelatin
zest of 1 orange
zest of 1/2 grapefruit
1/2 cup sugar
1/4 tsp salt
2 T lemon grass stalks
Bring 1-1/5 cups of half and half and all other ingredients other than the gelatin to a boil. Remove from heat and steep for 20 minutes. Meanwhile, bloom the gelatin in the remaining milk.
Strain out the lemon grass and most of the zest and add the hot milk to the bloomed gelatin and whisk vigorously to dissolve the gelatin completely. Divide into the pannacotta molds and refrigerate for atleast 3 hours. When ready, run a sharp knife around the edges to release the pannacotta from the mold.
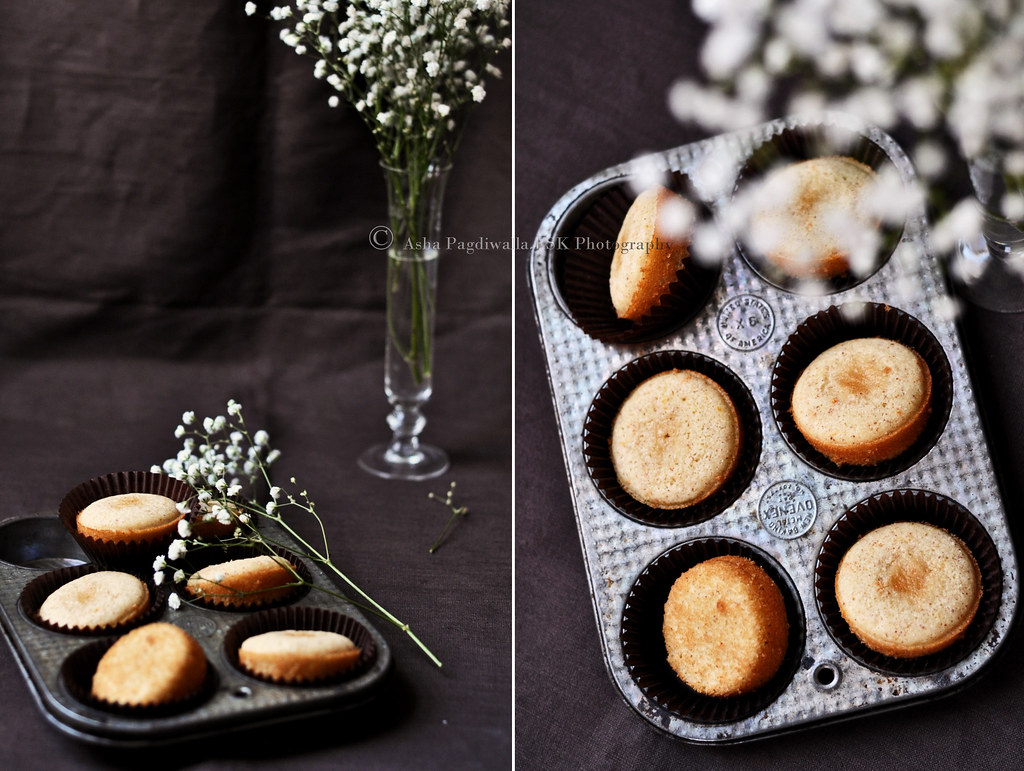
Lemon and Poppyseed Semolina Cake
1/2 cup apricot flour
1/2 cup fine semolina
1 T poppy seeds (black preferred. I used white because I did not have any black ones)
scant 1/2 cup sugar
zest of 1 lemon
60 g egg whites
1/2 cup milk
1/4 cup butter, melted and cooled
1/2 tsp salt
1/2 T baking powder (heaped)
Mix all the ingredients except the butter into a smooth batter. Add the butter and mix just until incorporated. Divide the batter into cup cake molds, filling upto 3/4 level of each mold. Bake at 300 F for 25-30 minutes until golden brown. Remove and cool on rack for a few minutes before releasing from the molds.
Citrus Meringue
80 g egg whites
80 g sugared apricot meal (grind 1/2 cup of apricots with 1/4 cup granulated sugar very finely. Reserve the rest for the cake or another use)
2 T cup sugar
zest of 1 grapefruit
Whip the whites to stiff peaks. Slowly add the sugar and continue until the mixture becomes glossy and holds stiff peaks. Mix the zest into the almond meal and gently fold it into the meringue just until incorporated. Transfer to a piping bag with a small round tip and pipe out 2.5 inch disks of about 3 mm thickness on to a silpat. If you have a stencil, it works best.
Bake at 260 F for 20-30 minutes until golden brown. Cool and carefully peel off the disks. Store in an airtight container.
Citrus Sauce
juice of 1 pink grapefruit
2 oranges juiced
2 T sugar (or to taste
1 small stick cinnamon
1 T butter
1/4 cup water
Bring everything to a boil and keep it rolling for 45 seconds. Remove from heat. Make this just before serving.
To Assemble:
Place a semolina cake at the base of a shallow soup bowl. Place a meringue disk over the cake and top with the pannacotta. Pour the citrus sauce until it comes up to 1/4 the height of the cake. Serve with slices of orange or grape fruit, mint and a fruit sorbet (optional).
2 cups half and half
2 tsp powdered gelatin
zest of 1 orange
zest of 1/2 grapefruit
1/2 cup sugar
1/4 tsp salt
2 T lemon grass stalks
Bring 1-1/5 cups of half and half and all other ingredients other than the gelatin to a boil. Remove from heat and steep for 20 minutes. Meanwhile, bloom the gelatin in the remaining milk.
Strain out the lemon grass and most of the zest and add the hot milk to the bloomed gelatin and whisk vigorously to dissolve the gelatin completely. Divide into the pannacotta molds and refrigerate for atleast 3 hours. When ready, run a sharp knife around the edges to release the pannacotta from the mold.
Lemon and Poppyseed Semolina Cake
1/2 cup apricot flour
1/2 cup fine semolina
1 T poppy seeds (black preferred. I used white because I did not have any black ones)
scant 1/2 cup sugar
zest of 1 lemon
60 g egg whites
1/2 cup milk
1/4 cup butter, melted and cooled
1/2 tsp salt
1/2 T baking powder (heaped)
Mix all the ingredients except the butter into a smooth batter. Add the butter and mix just until incorporated. Divide the batter into cup cake molds, filling upto 3/4 level of each mold. Bake at 300 F for 25-30 minutes until golden brown. Remove and cool on rack for a few minutes before releasing from the molds.
Citrus Meringue
80 g egg whites
80 g sugared apricot meal (grind 1/2 cup of apricots with 1/4 cup granulated sugar very finely. Reserve the rest for the cake or another use)
2 T cup sugar
zest of 1 grapefruit
Whip the whites to stiff peaks. Slowly add the sugar and continue until the mixture becomes glossy and holds stiff peaks. Mix the zest into the almond meal and gently fold it into the meringue just until incorporated. Transfer to a piping bag with a small round tip and pipe out 2.5 inch disks of about 3 mm thickness on to a silpat. If you have a stencil, it works best.
Bake at 260 F for 20-30 minutes until golden brown. Cool and carefully peel off the disks. Store in an airtight container.
Citrus Sauce
juice of 1 pink grapefruit
2 oranges juiced
2 T sugar (or to taste
1 small stick cinnamon
1 T butter
1/4 cup water
Bring everything to a boil and keep it rolling for 45 seconds. Remove from heat. Make this just before serving.
To Assemble:
Place a semolina cake at the base of a shallow soup bowl. Place a meringue disk over the cake and top with the pannacotta. Pour the citrus sauce until it comes up to 1/4 the height of the cake. Serve with slices of orange or grape fruit, mint and a fruit sorbet (optional).
Chocolate, Avocado and Orange Mousse Entremets - Daring Bakers

As every month edges closer to its last week, there come a bit of flurry into the FSK household. I am fully aware, on day 1, that the DB posting date comes around 26 days hence. Yet, the passage of time takes me by surprise every 30 days!! LOL.
For most of the month, I manage to run on cruise control, save for the occasional turns off the beaten path. Thankfully, atleast once a month, I am literally shoved off the main road, down a winding byway that promises much discovery. Often, it ends in a marked adrenaline rush and a happy ending ;-)! {I shall not elaborate!}
The January 2011 Daring Bakers’ challenge was hosted by Astheroshe of the blog accro. She chose to challenge everyone to make a Biscuit Joconde Imprime to wrap around an Entremets dessert.
This month, this year :), I was really looking forward to making my version of the challenge. Being a connissiour of all things French and a proclaimed dessert addict, Entremets hold a cherished place in my heart, as these delicacies deserve to have.
Besides, after countless hours of mesmerising over Helene's and Aran's gorgeous creations, it indeed was an aspirational item to recreate. There could not have been a better catalyst than the DB challenge. I find that more often than not, the group tends to push my creative envelope and I am much grateful for that.
After debating with self about flavor profiles and desire to experiment, I settled on chocolate as the lead ingredient and avocado as its supporting cast.
Now, that hit all the right buttons(!), a fabulous idea and great chance to experiment. Only, now I needed another ingredient that would balance the chocolate and avocado's creaminess and enhance their snooth flavors. And, that was citrus.
Oranges are flooding the market and despite the cold, it feels awesome to bite into the fresh flesh of a ripe, juicy orange after a warm, hearty meal. Somehow, it just lightens you up and gets you ready for the next one! :)
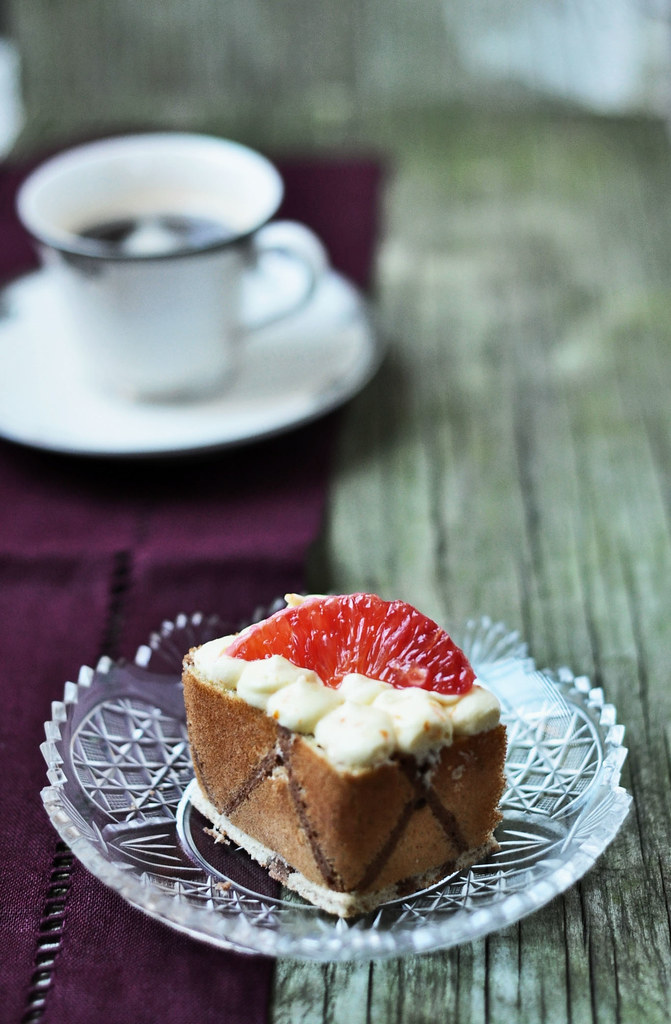
I used the recipe given to make my jaconde with chocolate decor crosslines. I made one sheet of it. My challenge was getting the sponge cooked without browning it too much. I overcooked the first one completely. The second was more successful but still too brown to stand up to a good entremet. Nevertheless, it was tasty!
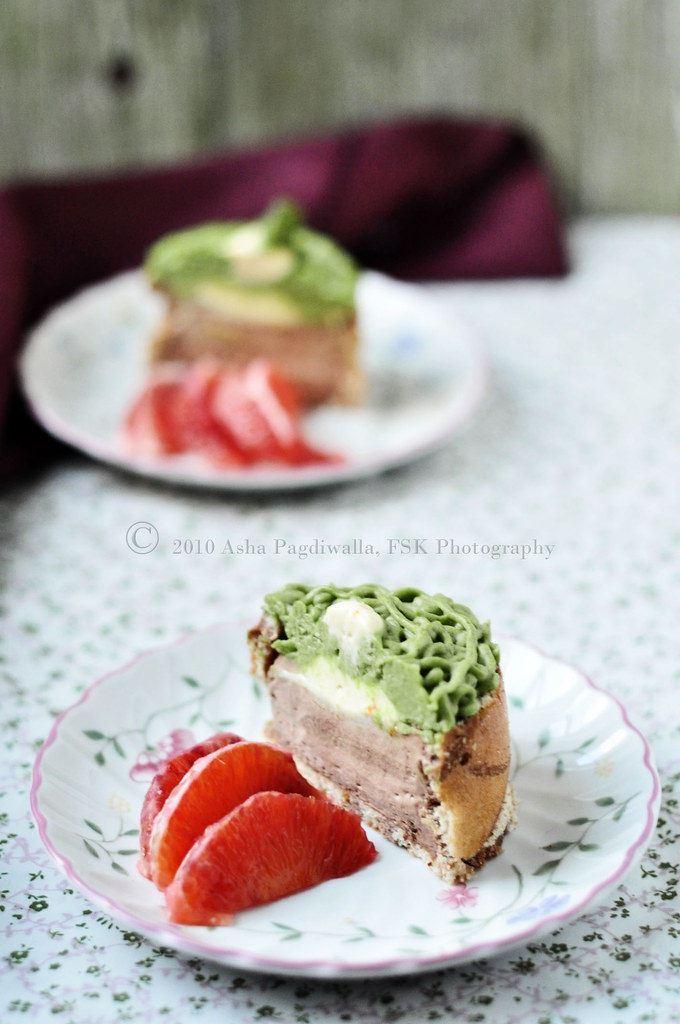
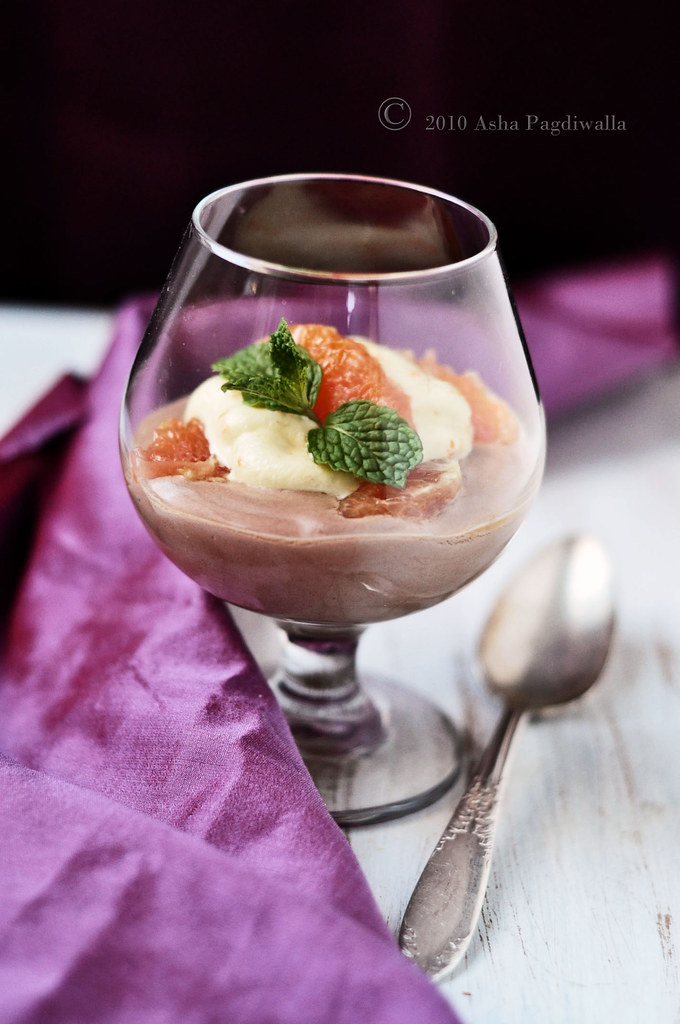
After going through almost a whole carton of eggs, I now have a lot of yolks with only time limiting my use of them. But, stay tuned for some rich recipes with them! I did some to make the rich mousses I filled my entremets with. I made a couple with all three mousses and a few with just chocolate and orange topped with fresh slices of the fruit.
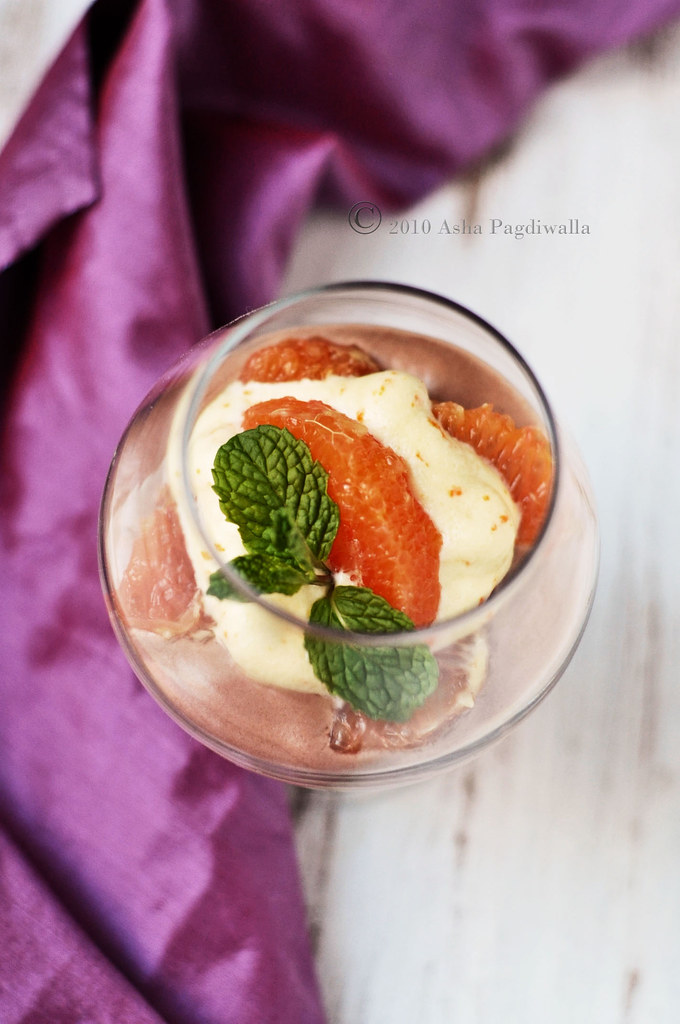
And, with the left over mousse, I just filled cups with the mousses alternated by slices of fresh fruit!
Chocolate Mousse
(adapted from Cannelle et Vanille)
2 egg yolks
50 g simple syrup
150 g whipping cream + 1 tsp powdered sugar
60 g bitter sweet chocolate, melted and cooled
Note: To make the simple syrup, use equal parts sugar and water, heat until the sugar dissolves and cool to room temperature before using.
Whip the cream and sugar until it holds soft peaks. Set in the refrigerator until ready to use.
Whisk together the yolks and syrup until light. Place over double boiler and continue whisking until light, foamy and thickened, about 5 minutes. Remove from the heat and continue whisking until the egg mixture has cooled up and whipped to be airy and fluffy like a custard cloud.
Gently fold in the liquid chocolate into the cooked custard. Fold a third of the whipped cream gently to loosen the mixture. Fold the remaining whipped cream to create a light mousse. Refrigerate for 30 mintues before piping or spooning into the prepared jaconde molds.
Orange Mousse
1 egg yolk
20 g simple syrup
1/3 cup heavy cream
zest of 1 orange
Whip the cream and sugar until it holds soft peaks. Set in the refrigerator until ready to use.
Whisk together the yolk and syrup until light. Place over double boiler and continue whisking until light, foamy and thickened, about 5 minutes. Remove from the heat and continue whisking until the egg mixture has cooled up and whipped to be airy and fluffy like a custard cloud.
Gently fold in the zest and whipped cream to create a light mousse. Refrigerate for 30 mintues before piping or spooning into the prepared jaconde molds.
Avocado Mousse
1/2 ripe avocado
1 T cream
1 tsp salt
1.5 T powdered sugar (depending on ripeness)
1/6 cup whipped cream
Whip the cream to soft peaks. Puree the avocado, cream,salt and sugar and strain through a fine mesh for a smooth, creamy mixture. Gently fold in the whipped cream. Transfer to a piping bag, refrigerate for 30 minutes before piping.
Orange Tian for Daring Bakers March 2010

The 2010 March Daring Baker’s challenge was hosted by Jennifer of Chocolate Shavings. She chose Orange Tian as the challenge for this month, a dessert based on a recipe from Alain Ducasse’s Cooking School in Paris.
What a wonderfully bright and cheerful dessert just in time for Spring! Oranges just brighten up a gloomy day with their color and refreshing taste, don't you agree?! For me, this was just the perfect way to signal the end of THE coldest winter of my life.
The tian has many steps to its assembly, which, gave me the leisure of creating it over two days and taking yet another day for photographing it.The trickiest part was to get the right firmness for the whipped cream since I chose not to use gelatin in making it. I just had to leave it in the freezer for longer to let it set well enough for easy (and neat) unmolding.
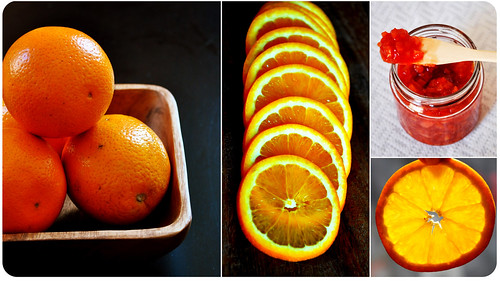
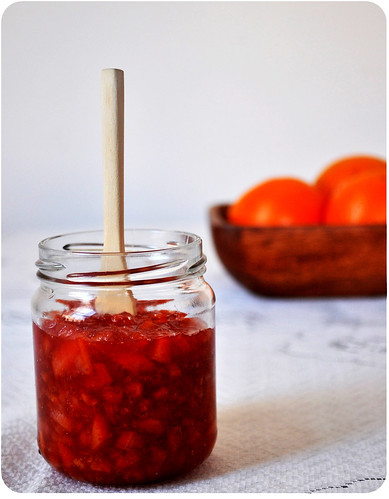
My favorite step in putting this dessert together was making the marmalade. Generally, I don't like marmalade much because it tends to be bitter and I really don't much like taking the bitter pill. But, this one wasn't bitter at all! It was more like jam just with more pizzaz... and a crunchier texture! :) I am going to bookmark this recipe and definitely make more again!
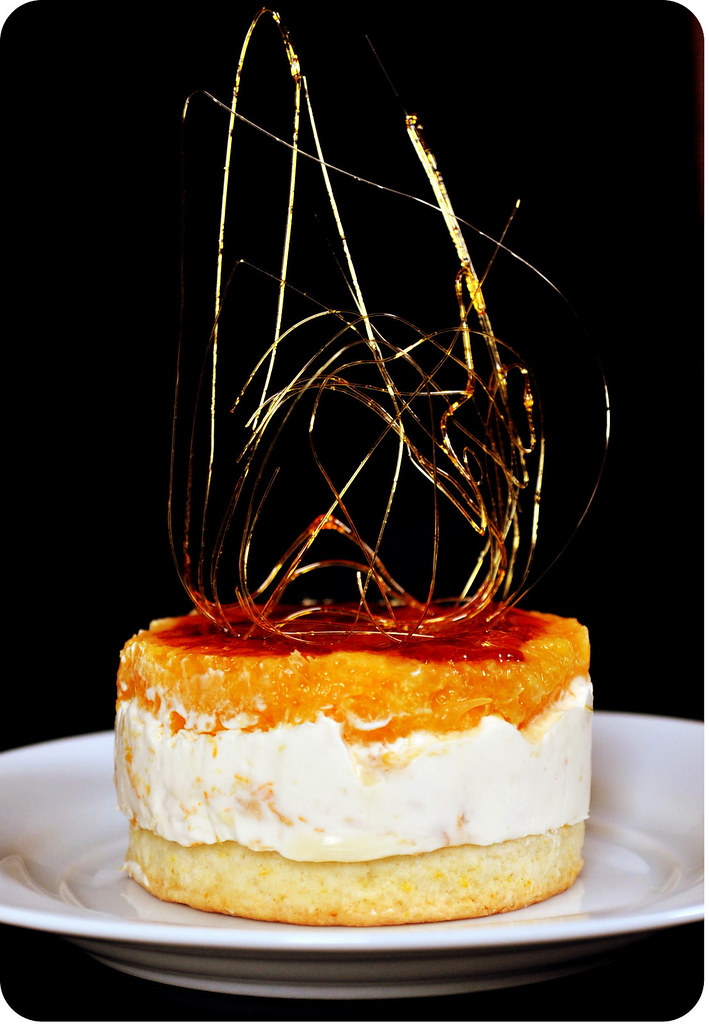
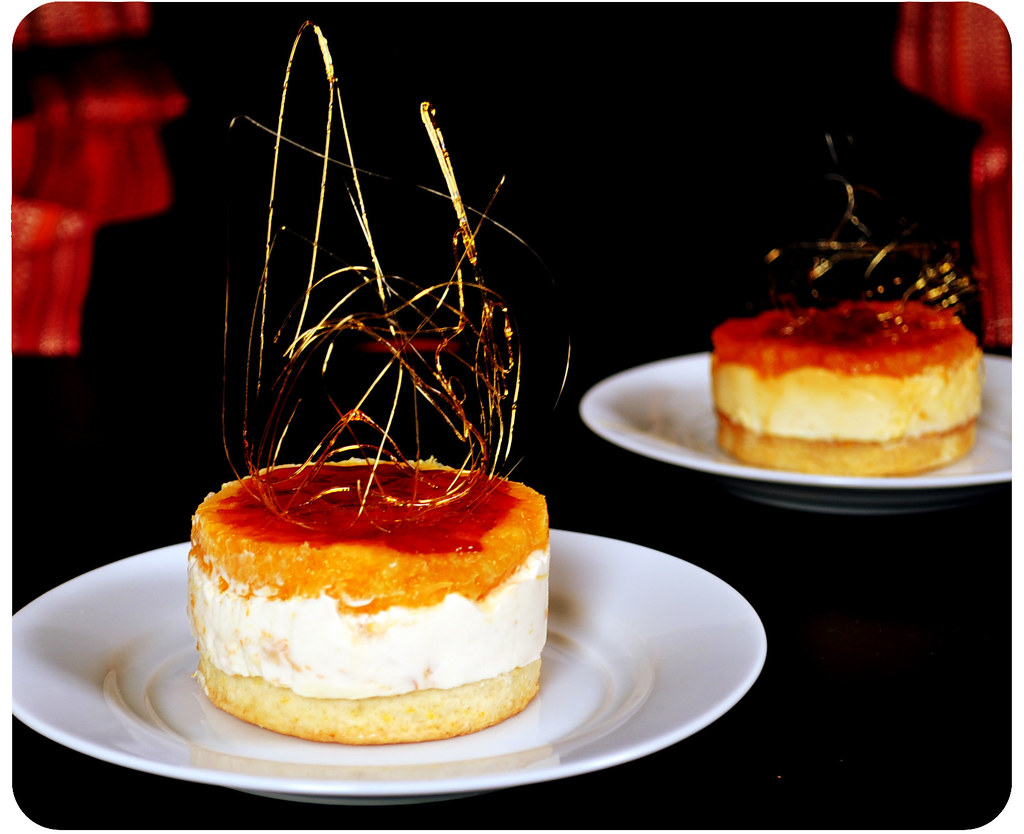
Since, I was a bit pressed for time this month, I pretty much stuck to the recipe. My only creative contribution was towards the presentation with the spikehead of spun toffee. Although the dessert was gorgeous by itself and the color from the oranges so vibrant, it seemed a bit two dimensional on its own on a plate. It called for visual 3D appeal. I thought about it for a bit and spun toffee seemed a nice note, extending the caramel theme that was already going on. Plus, I had never made spun toffee before, so it was a challenge for me.
When I first read the method, I shrugged and thought this should be a breeze. Yeah sure! I tried multiple methods; pressing two forks together and then pulling them apart, draping over utensil handles etc. But, somehow the threads were always too delicate and would break too soon.
I think I used up about half a pound of sugar in my experimenting! Frustration mounted, but, I couldn't give up. I had to get it right (I was really out of any other inspiration for my 3D display!) Finally, it happened. Yippeee!! The technique that finally worked was by using a whisk and my fingers as a reference mold.
As to the taste, the verdict was all good. It was refreshing and distinctly citrusy. I had flavored the pate sablee with orange zest as well. And, the caramel poured on top lent a smooth finish to the dessert and the toffee a good crunch!
Orange Tian with Spun Toffee
**Note: I reduced the amounts of sugar from the original recipe since I prefer my dessert less than very sweet. Please adjust sweetness to your taste.**
For the Pate Sablee:
2 medium-sized egg yolks at room temperature
4 T granulated sugar
zest of 1 orange
1/4 cup + 3 T unsalted butter, ice cold, cubed
1/3 tsp salt
1.5 cup + 2 T all-purpose flour
1 tsp baking powder
Put the flour, baking powder, ice cold cubed butter and salt in a food processor fitted with a steel blade. In a separate bowl, add the eggs yolks, zest and sugar and beat with a whisk until the mixture is pale. Pour the egg mixture in the food processor.
Process until the dough just comes together. If you find that the dough is still a little too crumbly to come together, add a couple drops of water and process again to form a homogenous ball of dough. Form into a disc, cover with plastic wrap and leave to rest in the fridge for 30 minutes.
Preheat your oven to 350 degree Fahrenheit. Roll out the dough onto a lightly floured surface until you obtain a ¼ inch thick circle. Using your cookie cutter, cut out circles of dough and place on a parchment (or silicone) lined baking sheet. Bake for 20 minutes or until the circles of dough are just golden.
For the Marmalade:
Juice of 2 oranges
1 large orange used to make orange slices
cold water to cook the orange slices
5g pectin
granulated sugar: use the same weight as the weight of orange slices once they are cooked ( I think I used about 3/4th this amount. It was still a bit too sweet)
Finely slice the orange. Place the orange slices in a medium-sized pot filled with cold water. Simmer for about 10 minutes, discard the water, re-fill with cold water and blanch the oranges for another 10 minutes.
Blanch the orange slices 3 times. This process removes the bitterness from the orange peel, so it is essential to use a new batch of cold water every time when you blanch the slices. Once blanched 3 times, drain the slices and let them cool.
Once they are cool enough to handle, finely mince them (using a knife or a food processor). Weigh the slices and use the same amount of granulated sugar . If you don’t have a scale, you can place the slices in a cup measurer and use the same amount of sugar.
In a pot over medium heat, add the minced orange slices, the sugar you just weighed, the orange juice and the pectin. Cook until the mixture reaches a jam consistency (10-15 minutes). Transfer to a bowl, cover with plastic wrap and put in the fridge.
For the Orange Segments:
Use as many as you need.
Cut the oranges into segments over a shallow bowl and make sure to keep the juice. Add the segments to the bowl with the juice.
For the Caramel:
1 cup granulated sugar
1.5 cups + 2 T orange juice
Place the sugar in a pan on medium heat and begin heating it. Once the sugar starts to bubble and foam, slowly add the orange juice. As soon as the mixture starts boiling, remove from the heat and pour half of the mixture over the orange segments.
Reserve the other half of the caramel mixture in a small bowl — you will use this later to spoon over the finished dessert. When the dessert is assembled and setting in the freezer, heat the kept caramel sauce in a small saucepan over low heat until it thickens and just coats the back of a spoon (about 10 minutes). You can then spoon it over the orange tians.
For the Whipped Cream:
1 cup heavy whipping cream
orange marmalade (see recipe above) 1 tablespoon
In a bowl, whip the cream using a hand mixer on low speed until the cream starts to thicken for about one minute. Increase the speed to medium-high. Continue whipping until the cream is light and fluffy and forms soft peaks. Transfer the whipped cream to a bowl and fold in the orange marmalade.
Assembling the Dessert:
Make sure you have some room in your freezer. Ideally, you should be able to fit a small baking sheet or tray of desserts to set in the freezer. Line a small tray or baking sheet with parchment paper or a silicone sheet. Lay out 6 cookie cutters onto the parchment paper/silicone.
Drain the orange segments on a kitchen towel. Have the marmalade, whipped cream and baked circles of dough ready to use. Arrange the orange segments at the bottom of each cookie cutter. Make sure the segments all touch either and that there are no gaps. Make sure they fit snuggly and look pretty as they will end up being the top of the dessert. Arrange them as you would sliced apples when making an apple tart.
Once you have neatly arranged one layer of orange segments at the bottom of each cookie cutter, add a couple spoonfuls of whipped cream and gently spread it so that it fills the cookie cutter in an even layer. Leave about 1/4 inch at the top so there is room for dough circle.
Using a butter knife or small spoon, spread a small even layer of orange marmalade on each circle of dough. Carefully place a circle of dough over each ring (the side of dough covered in marmalade should be the side touching the whipping cream). Gently press on the circle of dough to make sure the dessert is compact.
Place the desserts to set in the freezer to set for atleast 30 minutes (especially if you didn't use gelatin). Using a small knife, gently go around the edges of the cookie cutter to make sure the dessert will be easy to unmold. Gently place your serving plate on top of a dessert (on top of the circle of dough) and turn the plate over. Gently remove the cookie cutter, add a spoonful of caramel sauce and serve immediately.
Spun Toffee:
1/4 cup granulated sugar
2 T water
Heat the sugar and water on medium until the syrup starts discoloring. This will be over 250F. Remove from heat and let it cool for a minute. Dip a whisk in the liquid toffee and lift. If it leaves a very thin trail of liquid and falls easily, it needs to cool a bit more.
This is really a trial and error method. Once, the toffee has cooled enough to start hardening when you pull it into threads, using your fingers as guides spin the toffee threads into the shape you want. I am still getting there, hence the spike head! :)

What a wonderfully bright and cheerful dessert just in time for Spring! Oranges just brighten up a gloomy day with their color and refreshing taste, don't you agree?! For me, this was just the perfect way to signal the end of THE coldest winter of my life.
The tian has many steps to its assembly, which, gave me the leisure of creating it over two days and taking yet another day for photographing it.The trickiest part was to get the right firmness for the whipped cream since I chose not to use gelatin in making it. I just had to leave it in the freezer for longer to let it set well enough for easy (and neat) unmolding.
My favorite step in putting this dessert together was making the marmalade. Generally, I don't like marmalade much because it tends to be bitter and I really don't much like taking the bitter pill. But, this one wasn't bitter at all! It was more like jam just with more pizzaz... and a crunchier texture! :) I am going to bookmark this recipe and definitely make more again!
Since, I was a bit pressed for time this month, I pretty much stuck to the recipe. My only creative contribution was towards the presentation with the spikehead of spun toffee. Although the dessert was gorgeous by itself and the color from the oranges so vibrant, it seemed a bit two dimensional on its own on a plate. It called for visual 3D appeal. I thought about it for a bit and spun toffee seemed a nice note, extending the caramel theme that was already going on. Plus, I had never made spun toffee before, so it was a challenge for me.
When I first read the method, I shrugged and thought this should be a breeze. Yeah sure! I tried multiple methods; pressing two forks together and then pulling them apart, draping over utensil handles etc. But, somehow the threads were always too delicate and would break too soon.
I think I used up about half a pound of sugar in my experimenting! Frustration mounted, but, I couldn't give up. I had to get it right (I was really out of any other inspiration for my 3D display!) Finally, it happened. Yippeee!! The technique that finally worked was by using a whisk and my fingers as a reference mold.
As to the taste, the verdict was all good. It was refreshing and distinctly citrusy. I had flavored the pate sablee with orange zest as well. And, the caramel poured on top lent a smooth finish to the dessert and the toffee a good crunch!
Orange Tian with Spun Toffee
**Note: I reduced the amounts of sugar from the original recipe since I prefer my dessert less than very sweet. Please adjust sweetness to your taste.**
For the Pate Sablee:
2 medium-sized egg yolks at room temperature
4 T granulated sugar
zest of 1 orange
1/4 cup + 3 T unsalted butter, ice cold, cubed
1/3 tsp salt
1.5 cup + 2 T all-purpose flour
1 tsp baking powder
Put the flour, baking powder, ice cold cubed butter and salt in a food processor fitted with a steel blade. In a separate bowl, add the eggs yolks, zest and sugar and beat with a whisk until the mixture is pale. Pour the egg mixture in the food processor.
Process until the dough just comes together. If you find that the dough is still a little too crumbly to come together, add a couple drops of water and process again to form a homogenous ball of dough. Form into a disc, cover with plastic wrap and leave to rest in the fridge for 30 minutes.
Preheat your oven to 350 degree Fahrenheit. Roll out the dough onto a lightly floured surface until you obtain a ¼ inch thick circle. Using your cookie cutter, cut out circles of dough and place on a parchment (or silicone) lined baking sheet. Bake for 20 minutes or until the circles of dough are just golden.
For the Marmalade:
Juice of 2 oranges
1 large orange used to make orange slices
cold water to cook the orange slices
5g pectin
granulated sugar: use the same weight as the weight of orange slices once they are cooked ( I think I used about 3/4th this amount. It was still a bit too sweet)
Finely slice the orange. Place the orange slices in a medium-sized pot filled with cold water. Simmer for about 10 minutes, discard the water, re-fill with cold water and blanch the oranges for another 10 minutes.
Blanch the orange slices 3 times. This process removes the bitterness from the orange peel, so it is essential to use a new batch of cold water every time when you blanch the slices. Once blanched 3 times, drain the slices and let them cool.
Once they are cool enough to handle, finely mince them (using a knife or a food processor). Weigh the slices and use the same amount of granulated sugar . If you don’t have a scale, you can place the slices in a cup measurer and use the same amount of sugar.
In a pot over medium heat, add the minced orange slices, the sugar you just weighed, the orange juice and the pectin. Cook until the mixture reaches a jam consistency (10-15 minutes). Transfer to a bowl, cover with plastic wrap and put in the fridge.
For the Orange Segments:
Use as many as you need.
Cut the oranges into segments over a shallow bowl and make sure to keep the juice. Add the segments to the bowl with the juice.
For the Caramel:
1 cup granulated sugar
1.5 cups + 2 T orange juice
Place the sugar in a pan on medium heat and begin heating it. Once the sugar starts to bubble and foam, slowly add the orange juice. As soon as the mixture starts boiling, remove from the heat and pour half of the mixture over the orange segments.
Reserve the other half of the caramel mixture in a small bowl — you will use this later to spoon over the finished dessert. When the dessert is assembled and setting in the freezer, heat the kept caramel sauce in a small saucepan over low heat until it thickens and just coats the back of a spoon (about 10 minutes). You can then spoon it over the orange tians.
For the Whipped Cream:
1 cup heavy whipping cream
orange marmalade (see recipe above) 1 tablespoon
In a bowl, whip the cream using a hand mixer on low speed until the cream starts to thicken for about one minute. Increase the speed to medium-high. Continue whipping until the cream is light and fluffy and forms soft peaks. Transfer the whipped cream to a bowl and fold in the orange marmalade.
Assembling the Dessert:
Make sure you have some room in your freezer. Ideally, you should be able to fit a small baking sheet or tray of desserts to set in the freezer. Line a small tray or baking sheet with parchment paper or a silicone sheet. Lay out 6 cookie cutters onto the parchment paper/silicone.
Drain the orange segments on a kitchen towel. Have the marmalade, whipped cream and baked circles of dough ready to use. Arrange the orange segments at the bottom of each cookie cutter. Make sure the segments all touch either and that there are no gaps. Make sure they fit snuggly and look pretty as they will end up being the top of the dessert. Arrange them as you would sliced apples when making an apple tart.
Once you have neatly arranged one layer of orange segments at the bottom of each cookie cutter, add a couple spoonfuls of whipped cream and gently spread it so that it fills the cookie cutter in an even layer. Leave about 1/4 inch at the top so there is room for dough circle.
Using a butter knife or small spoon, spread a small even layer of orange marmalade on each circle of dough. Carefully place a circle of dough over each ring (the side of dough covered in marmalade should be the side touching the whipping cream). Gently press on the circle of dough to make sure the dessert is compact.
Place the desserts to set in the freezer to set for atleast 30 minutes (especially if you didn't use gelatin). Using a small knife, gently go around the edges of the cookie cutter to make sure the dessert will be easy to unmold. Gently place your serving plate on top of a dessert (on top of the circle of dough) and turn the plate over. Gently remove the cookie cutter, add a spoonful of caramel sauce and serve immediately.
Spun Toffee:
1/4 cup granulated sugar
2 T water
Heat the sugar and water on medium until the syrup starts discoloring. This will be over 250F. Remove from heat and let it cool for a minute. Dip a whisk in the liquid toffee and lift. If it leaves a very thin trail of liquid and falls easily, it needs to cool a bit more.
This is really a trial and error method. Once, the toffee has cooled enough to start hardening when you pull it into threads, using your fingers as guides spin the toffee threads into the shape you want. I am still getting there, hence the spike head! :)